> ## Documentation Index
> Fetch the complete documentation index at: https://utexo-e7ed9bd0-update.mintlify.site/llms.txt
> Use this file to discover all available pages before exploring further.
# Getting Started
## How Ethereum → RGB Transfers Work
When transferring USDT from the Ethereum network to RGB, you receive an equivalent TUSDT token in the RGB network. The transfer is made through Utexo, with transactions signed in MetaMask and an RGB invoice used as the recipient address.
🔧 Requirements Before You Start
**MetaMask**
* ETH balance (to pay for gas fees).
* USDT balance (the amount you will transfer).
**IRIS Wallet (Mobile App)**
* BTC balance (to pay the RGB transaction fee).
**Connect RGB Wallet on the Bridge** — you can do this in two ways:
* Click CONNECT RGB WALLET at the bottom of the bridge form.
* Open the wallet list in the top-right corner of the bridge page and click the power button next to RGBWallet.
**Enter the amount** — In the Amount field, enter the number of USDT tokens to transfer.
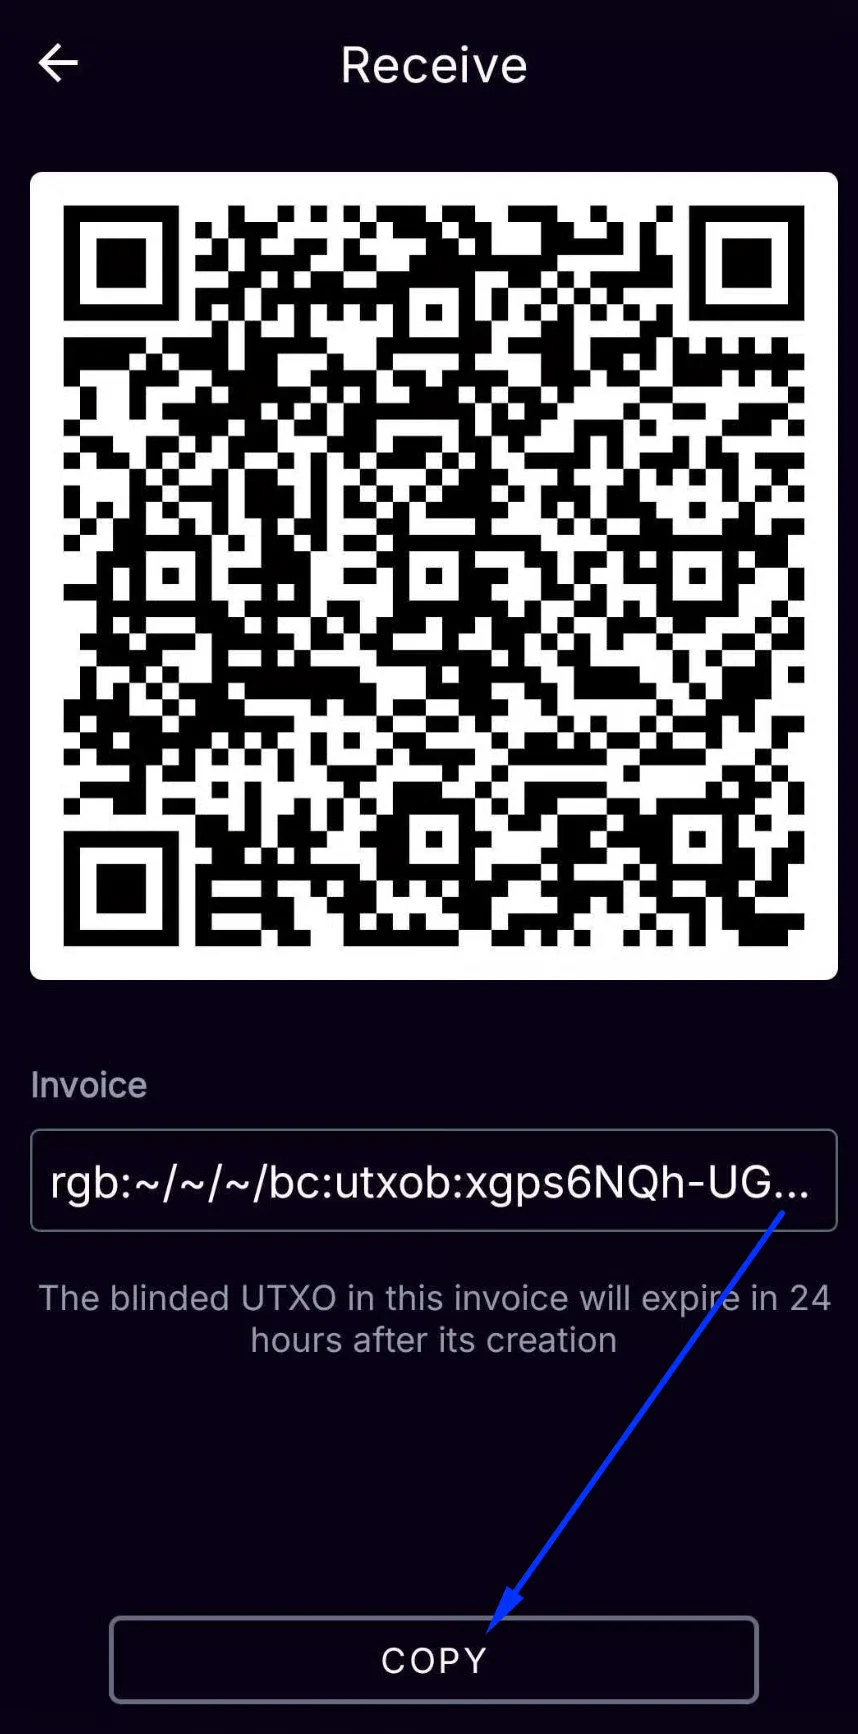
**Enter the destination address** — In the Destination field, paste an RGB invoice generated in the IRIS Wallet mobile app:
* Ensure your wallet has a BTC balance to cover the transaction fee.
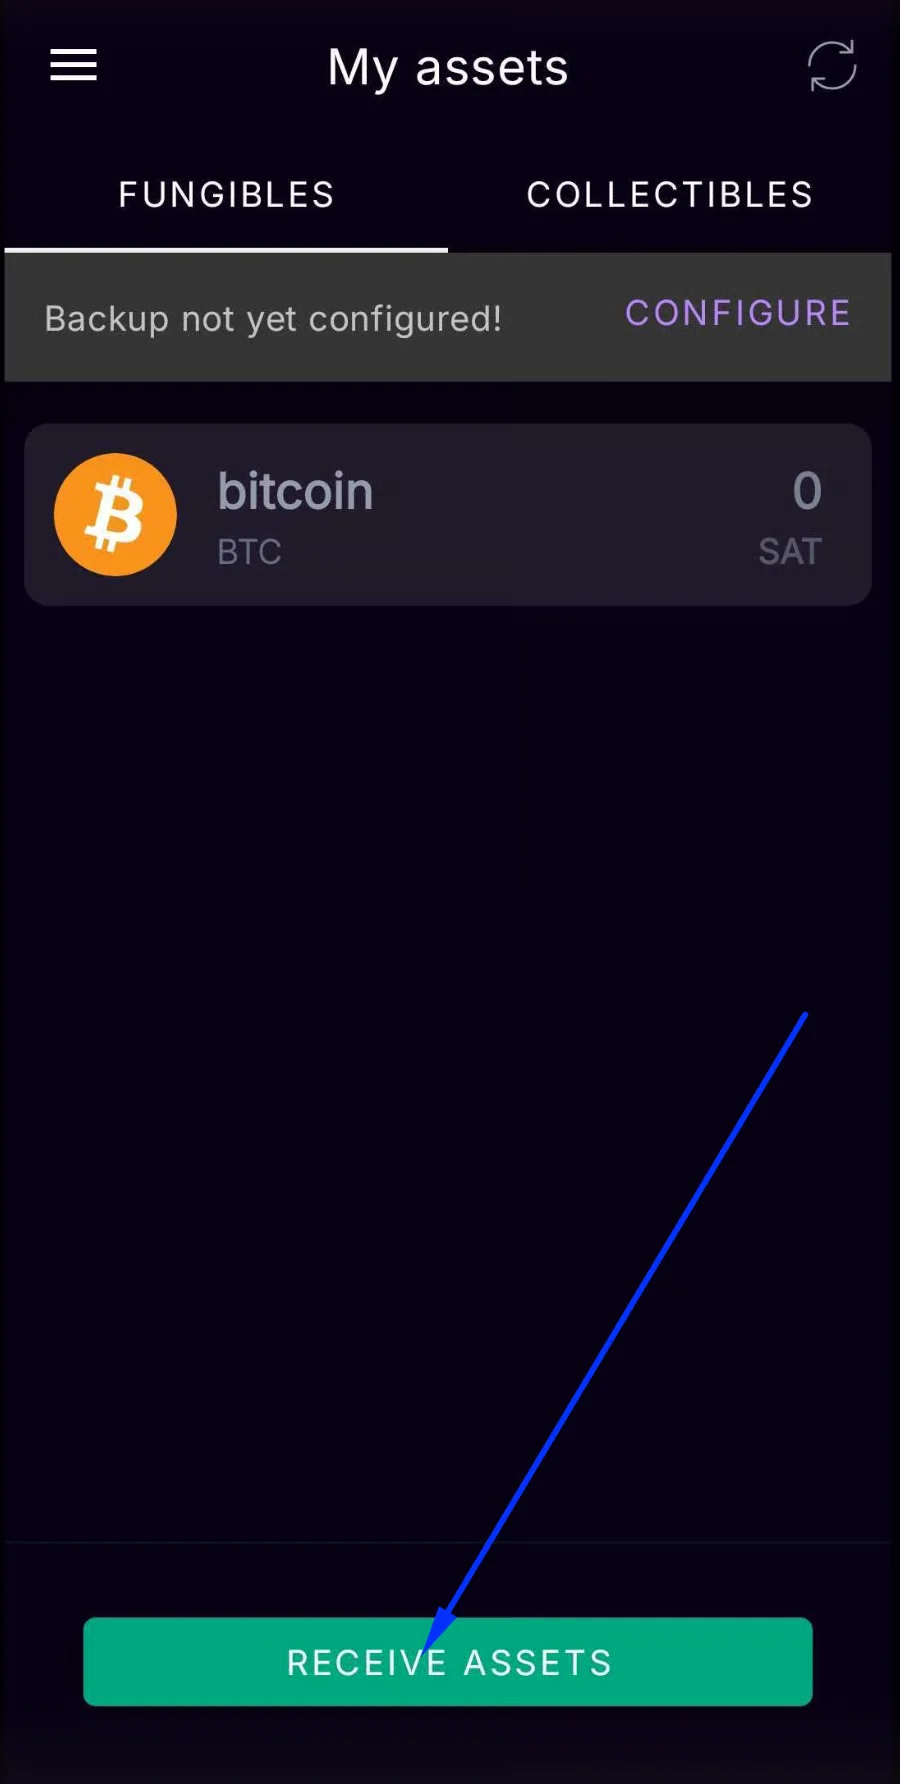
* Open IRIS Wallet → select Receive assets.
* Generate the invoice and copy it.
* Paste this invoice into the Destination field on Utexo.
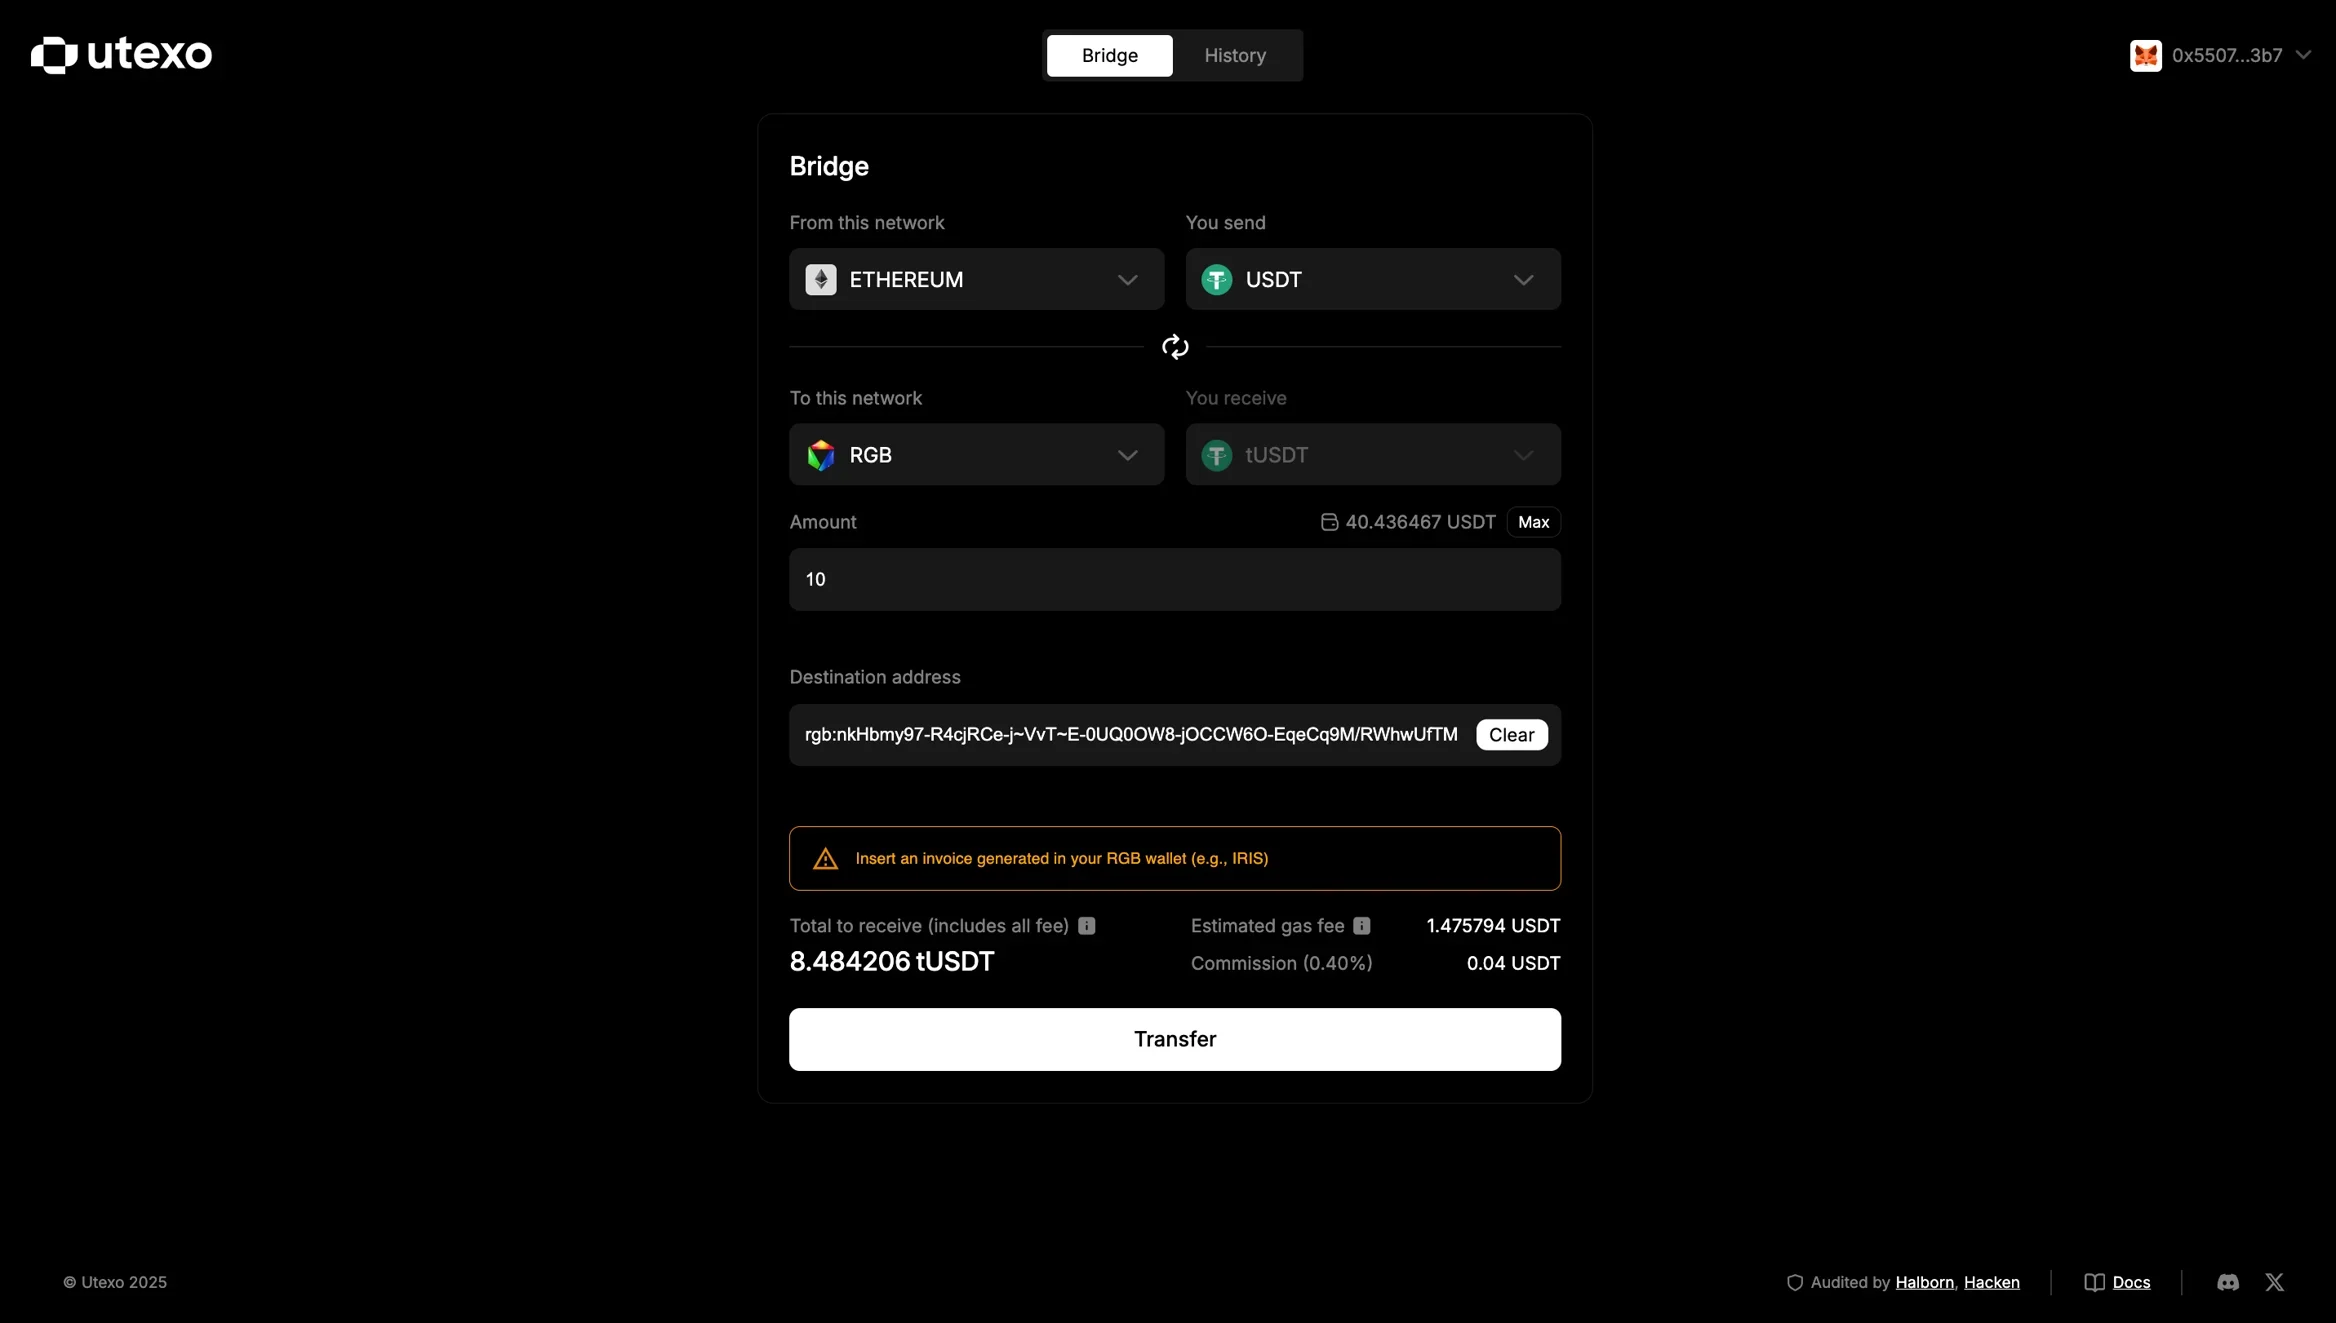 After filling in the form, a **Transaction Preview** will appear showing:
* **You will receive** — estimated amount of tUSDT after fees.
* **Estimated gas fee** — Ethereum network gas fee at live market rates.
* **Bridge commission** — fixed % fee charged by Utexo.
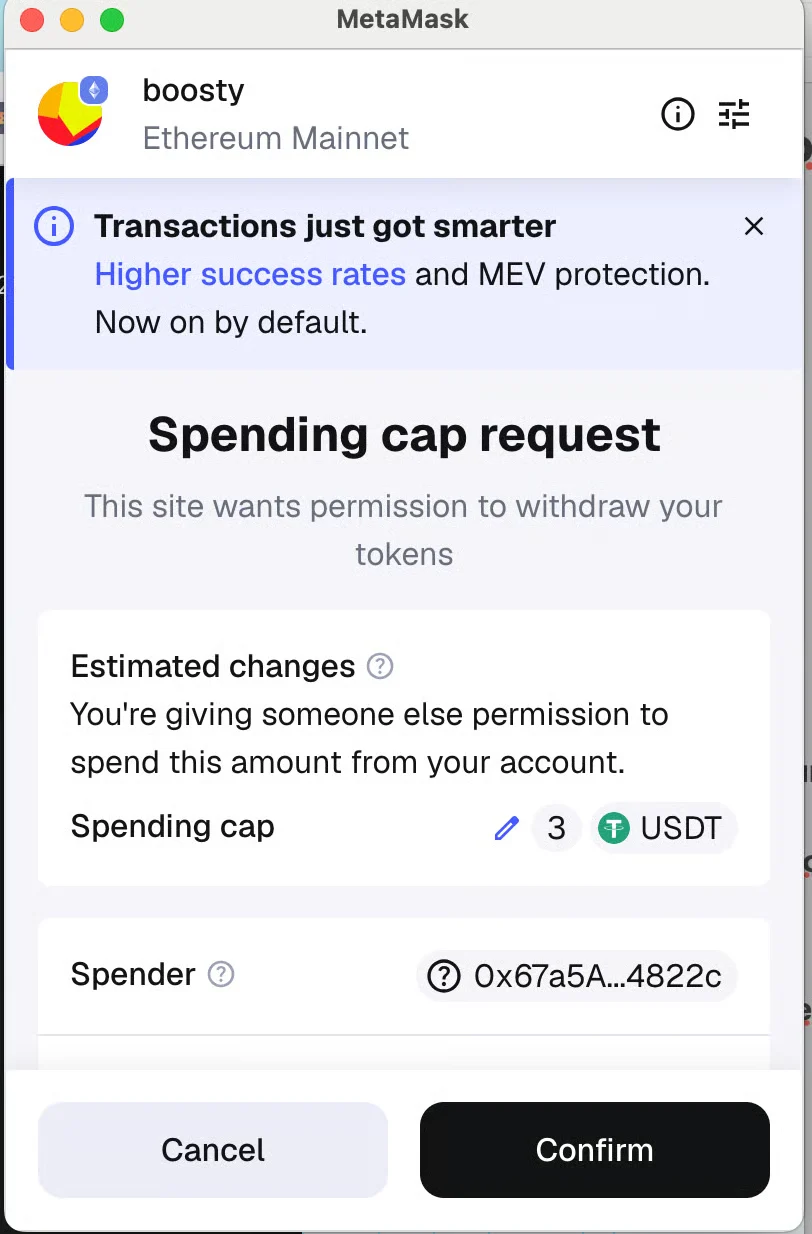
Click **Transfer**. MetaMask will request confirmation in three stages:
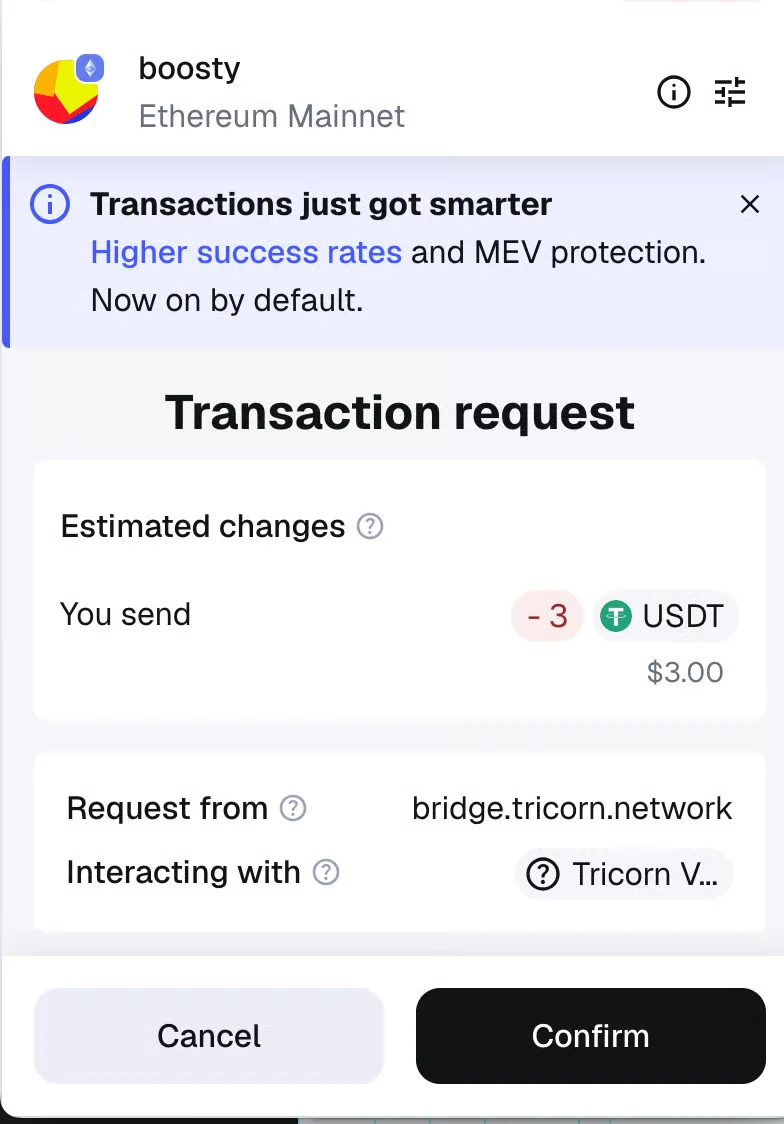
**Approve token spending** — A MetaMask popup will appear asking you to approve USDT spending. Click Confirm.
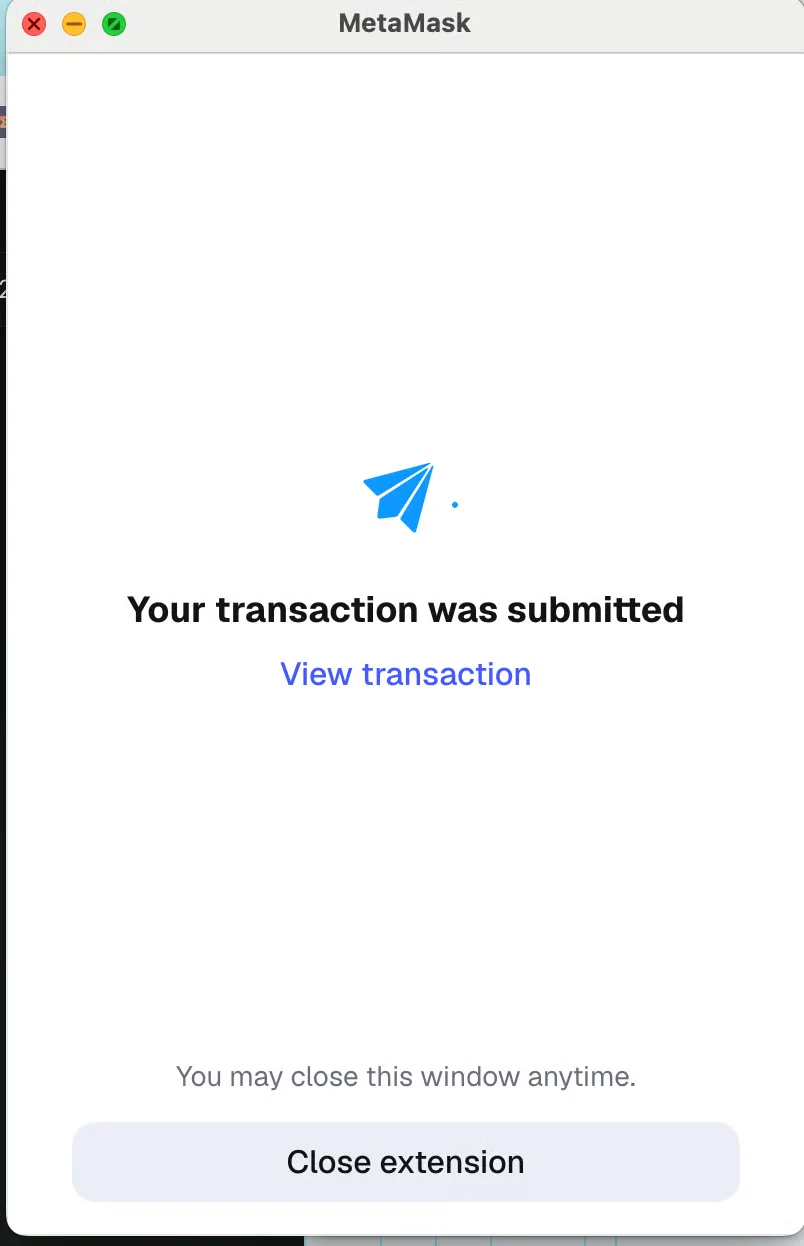
**Confirm the transaction** — Wait 2–10 seconds for the second MetaMask popup. Review the details and click Confirm to complete the transfer.
In the IRIS Wallet mobile app, wait until the tUSDT tokens are credited to your balance.
This may take longer than usual due to high Bitcoin network congestion.
## w RGB → Ethereum Transfers Work (TUSDT → USDT)
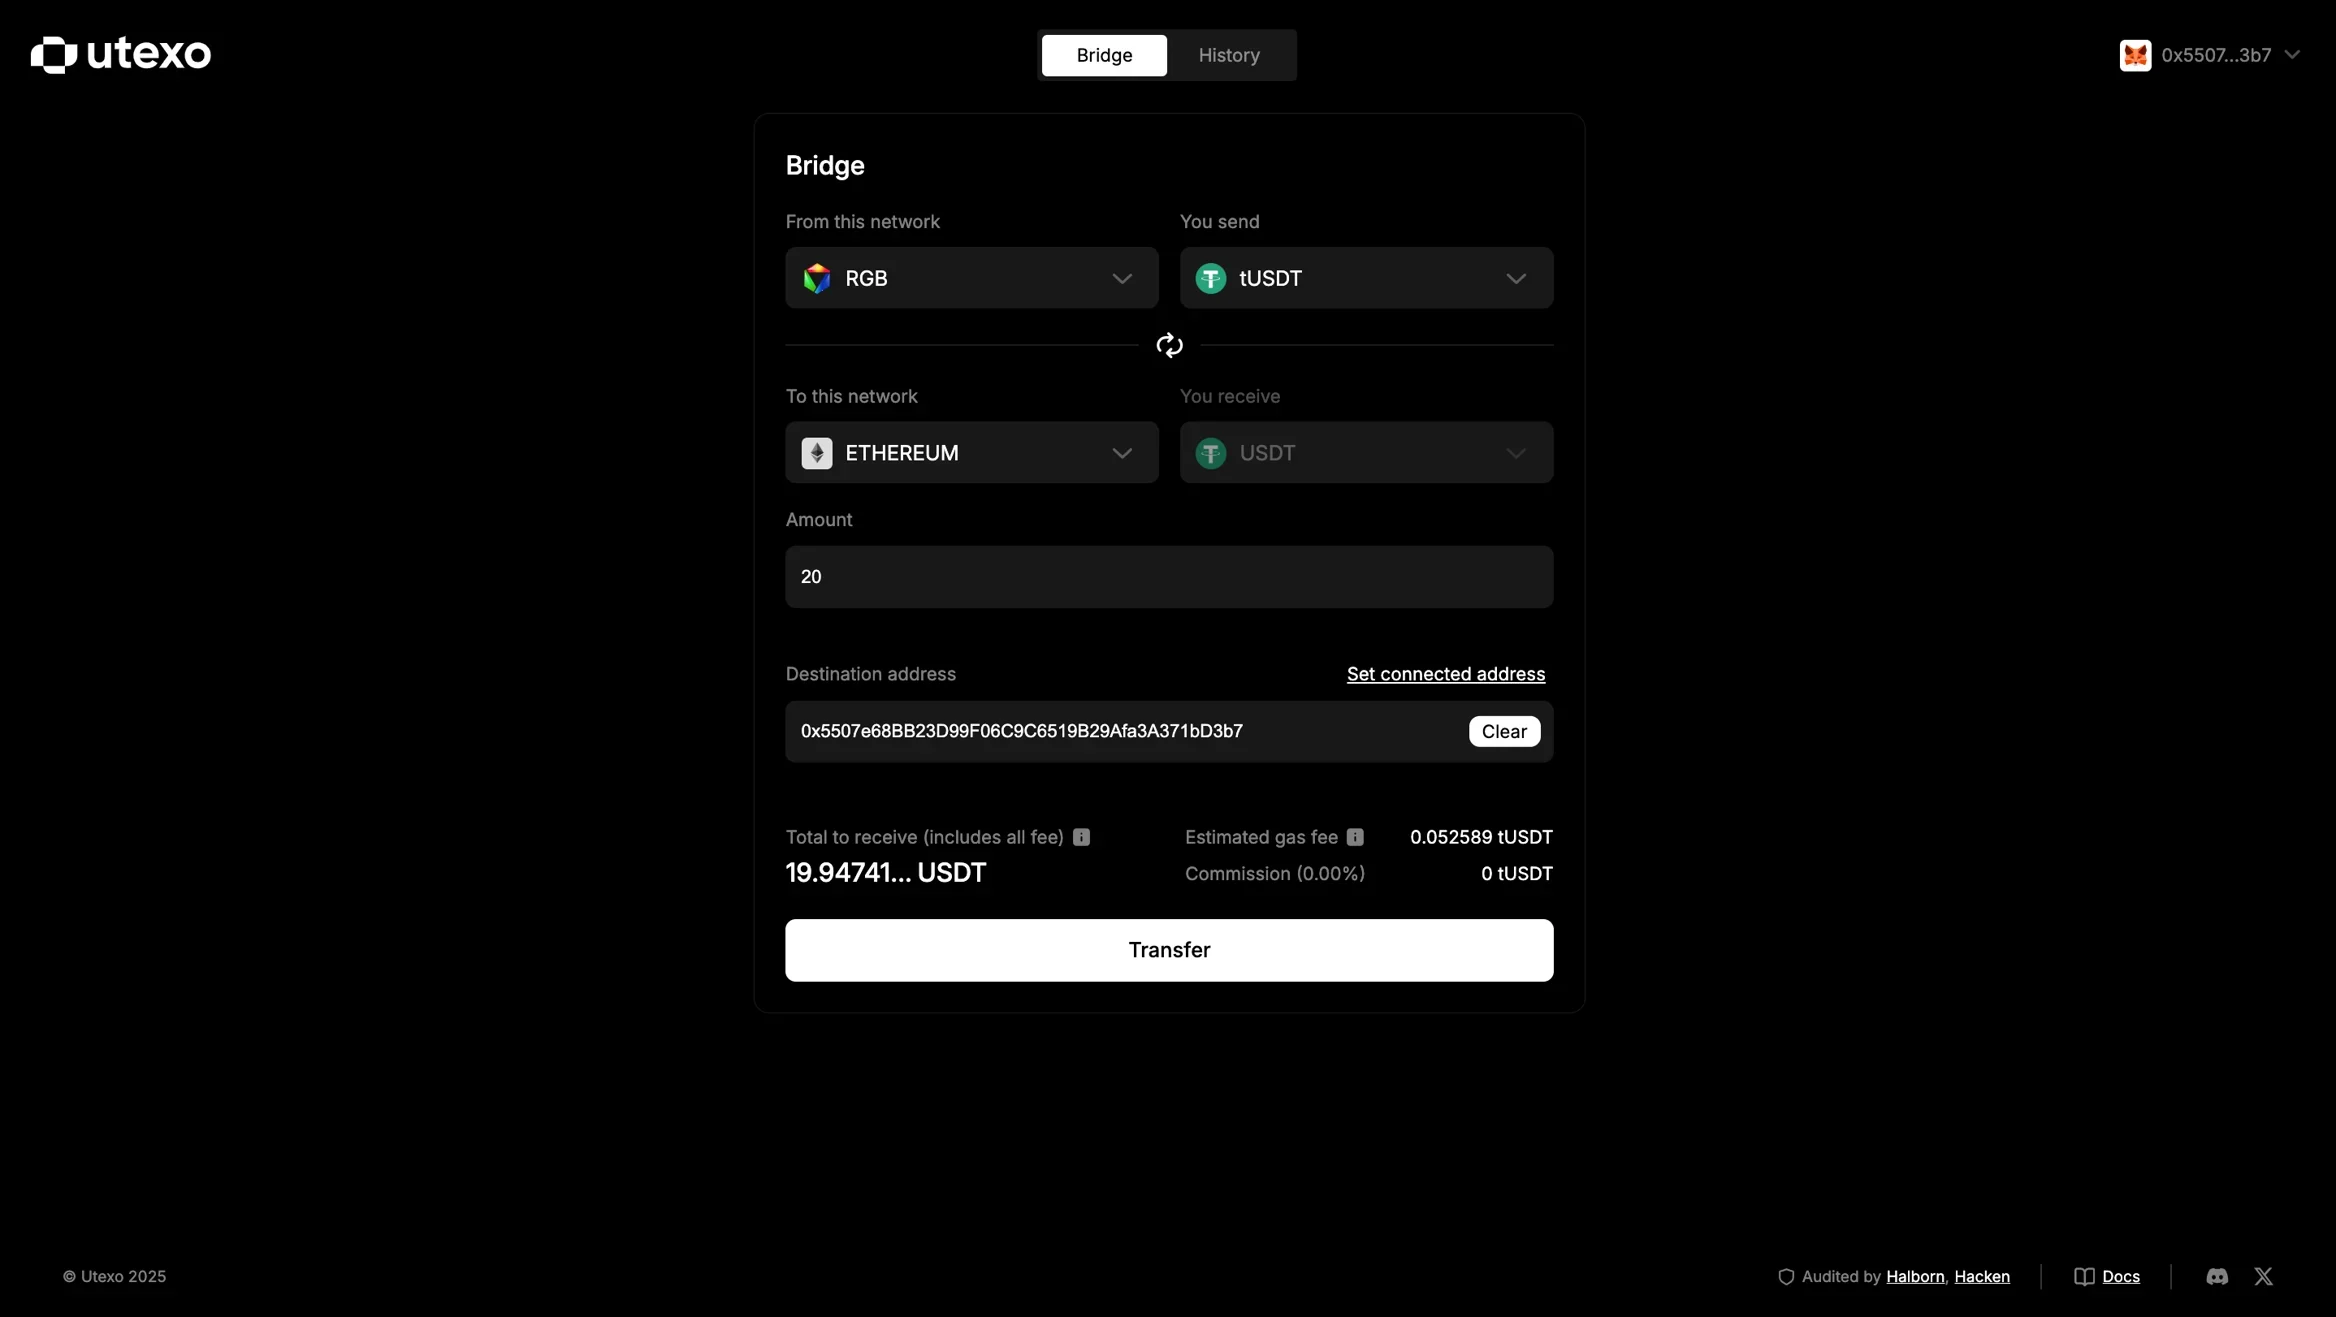
On Utexo, set:
* **Send:** Blockchain – RGB, Token – TUSDT.
* **Receive:** Blockchain – Ethereum, Token – USDT.
Enter the **Amount** of TUSDT you want to send.
In the **Destination address** field, enter your Ethereum address (MetaMask).
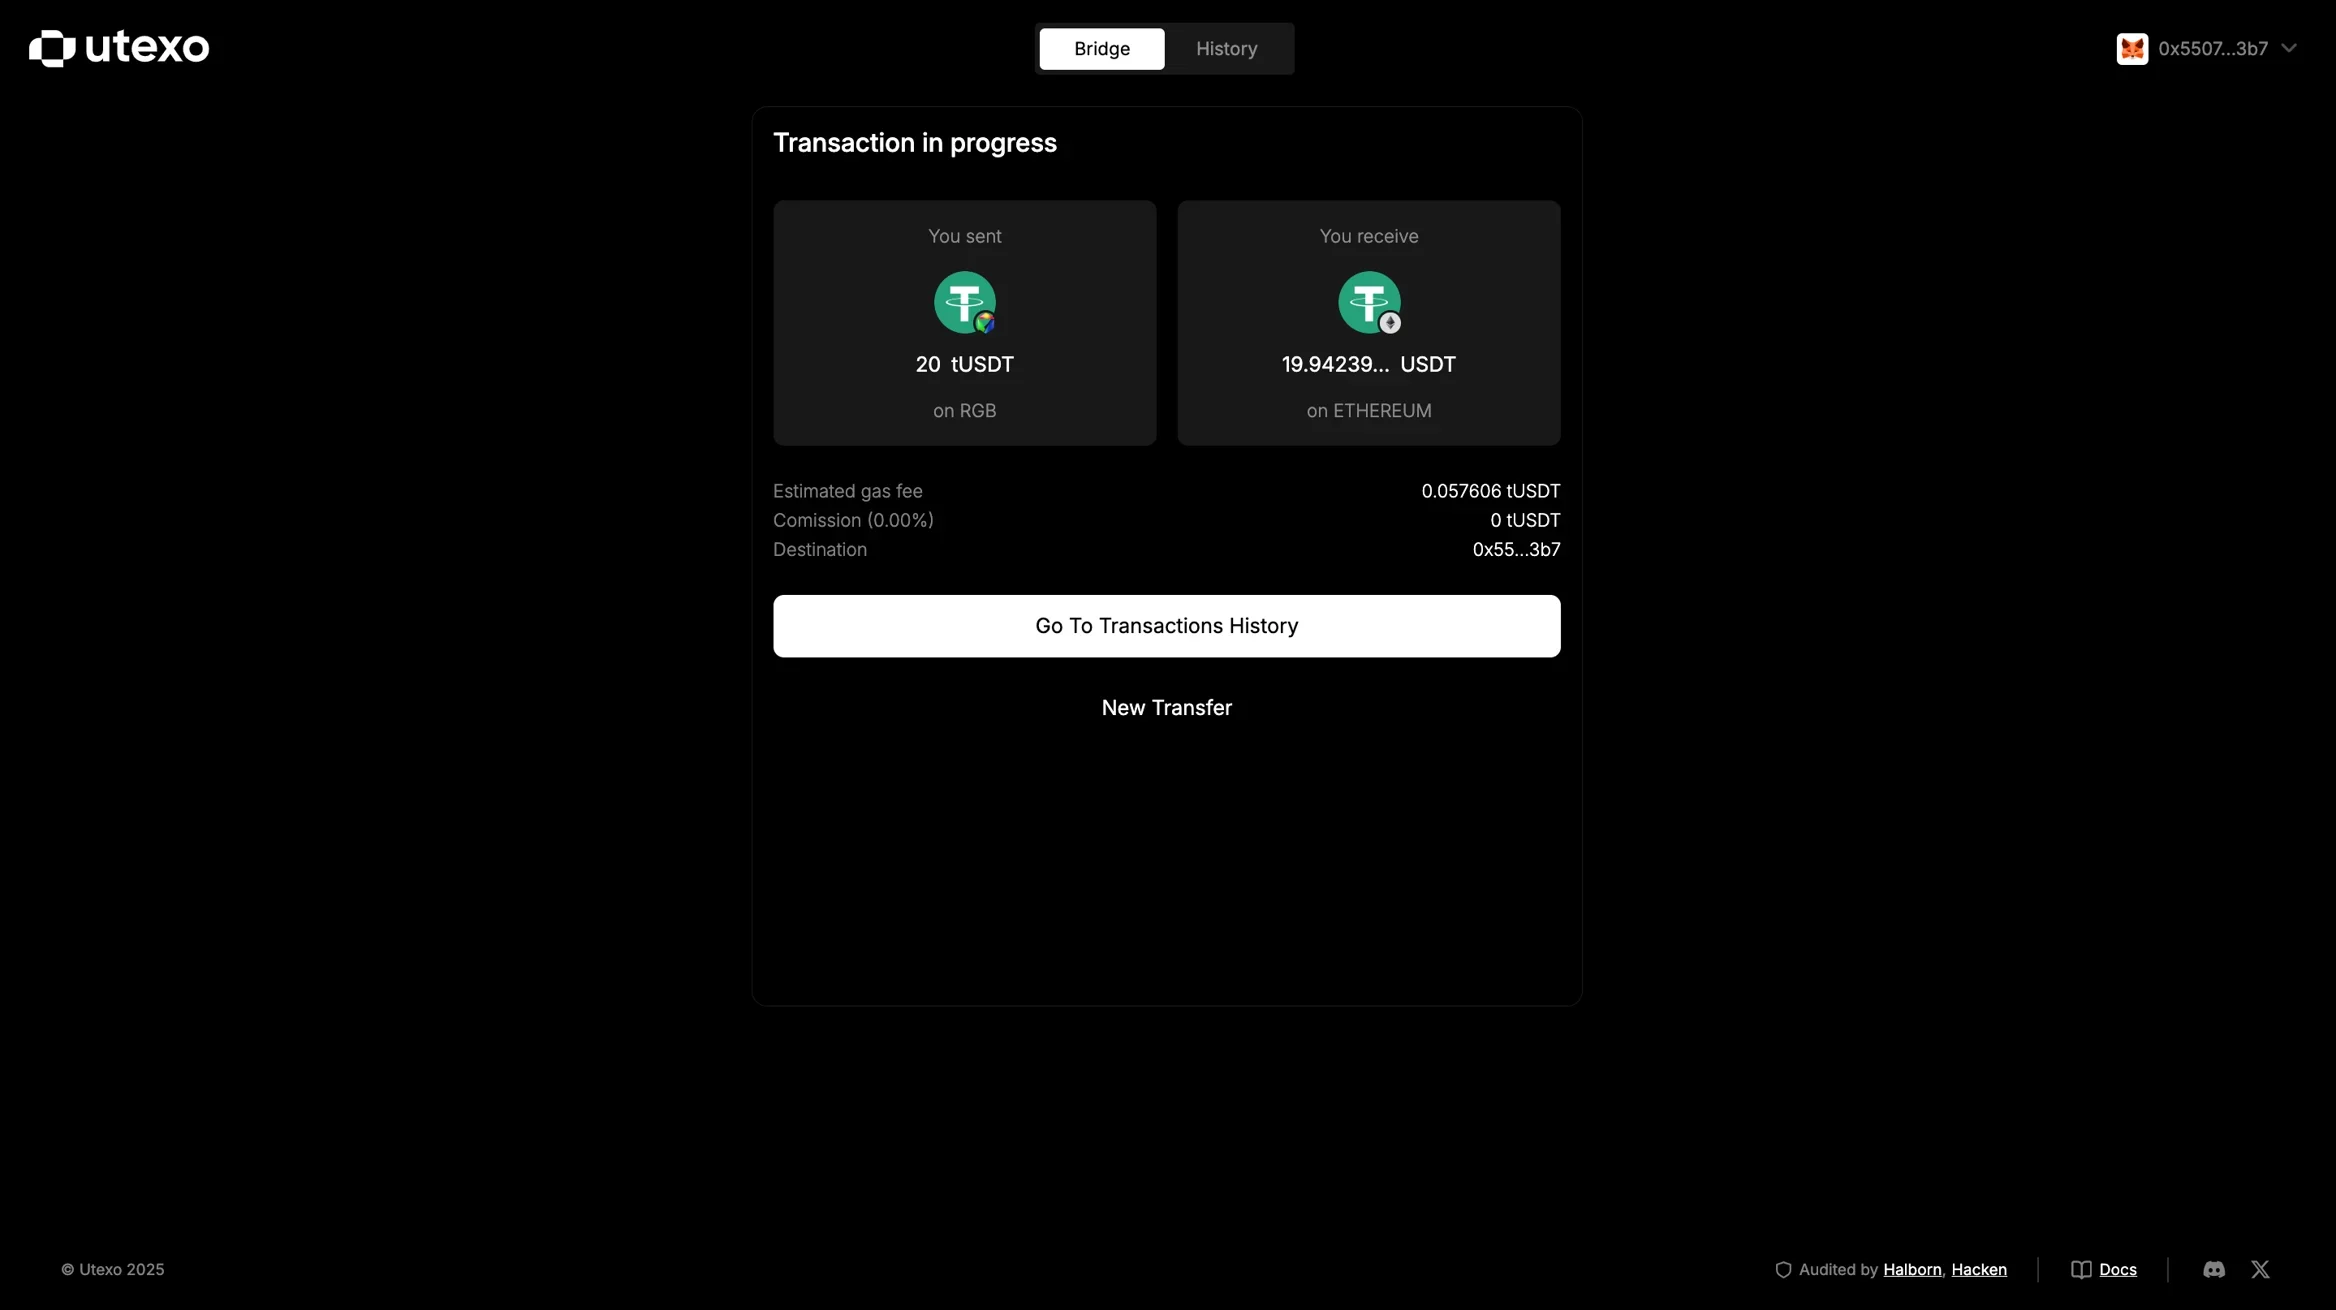
Review the preview section, it will display:
* **You will receive** - estimated amount of USDT after fees.
* **Estimated gas fee** and Commission.
Click **TRANSFER**.
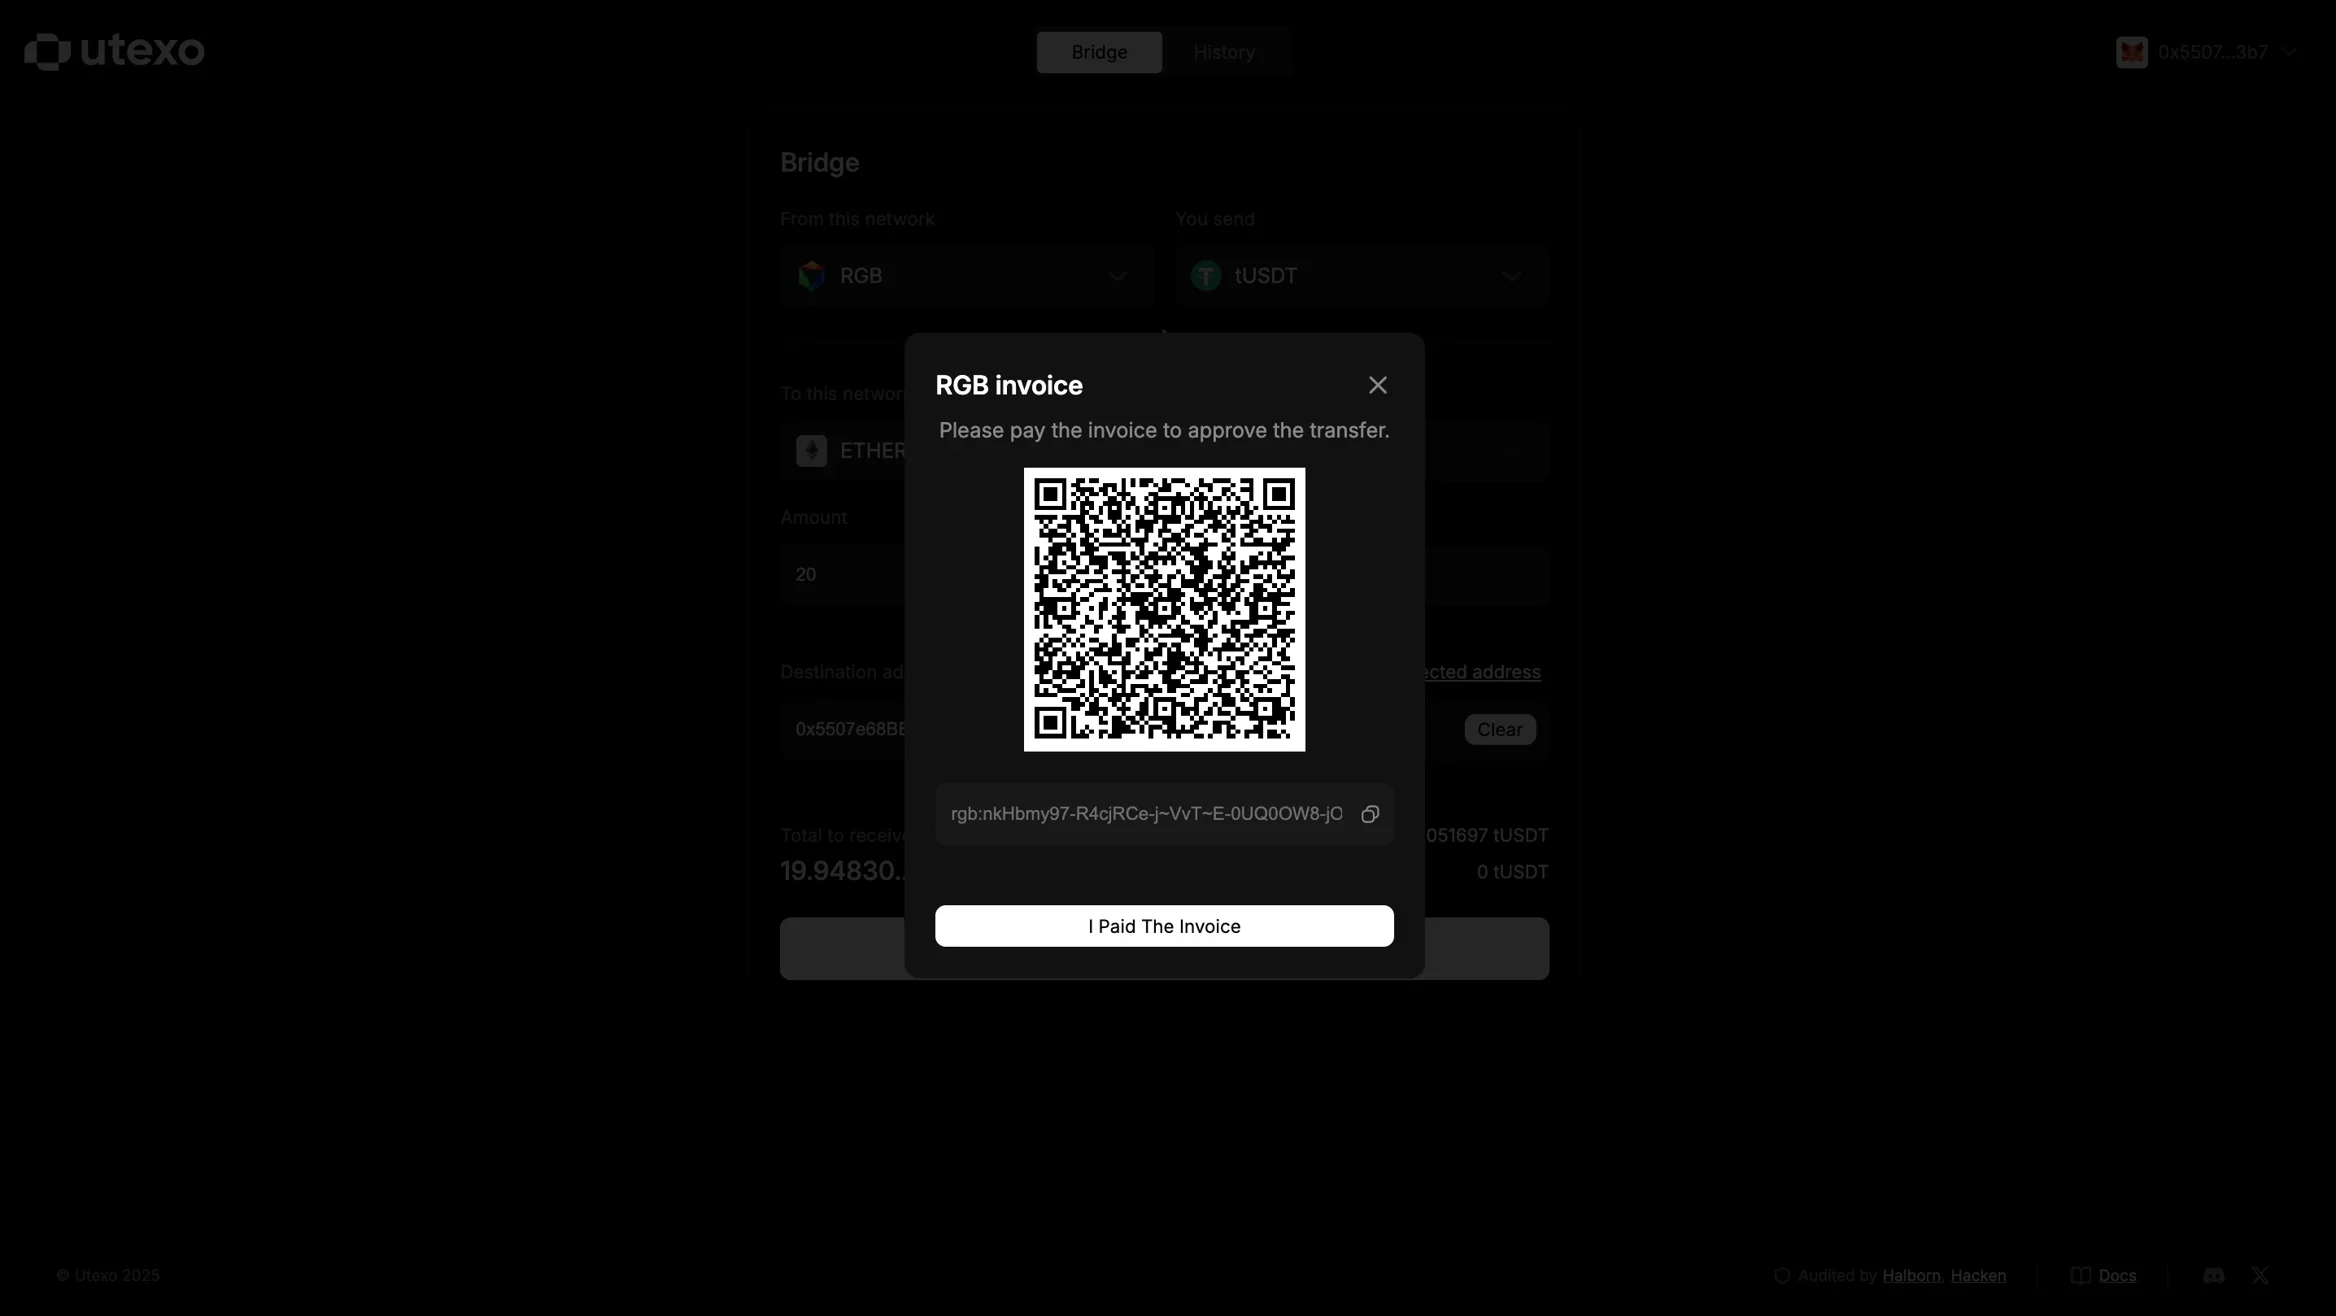
* Once the bridge generates the RGB invoice (popup with QR code), open the IRIS Wallet mobile app.
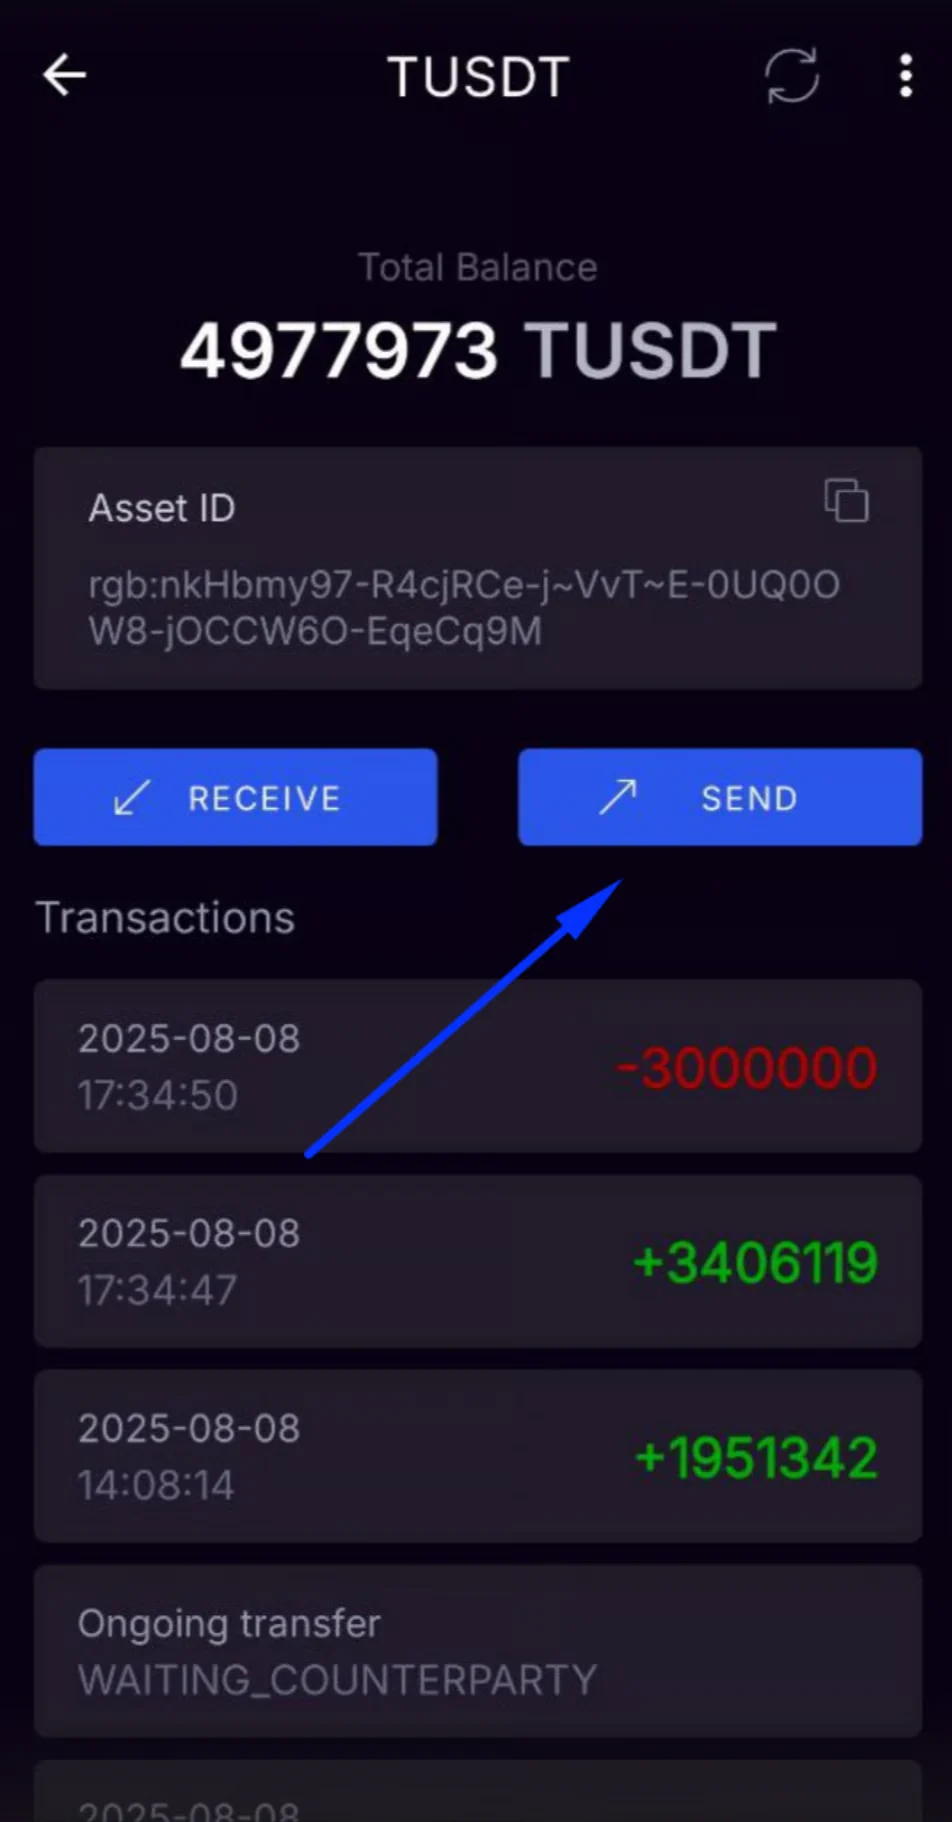
* Go to your TUSDT token.
* Tap **Send**.
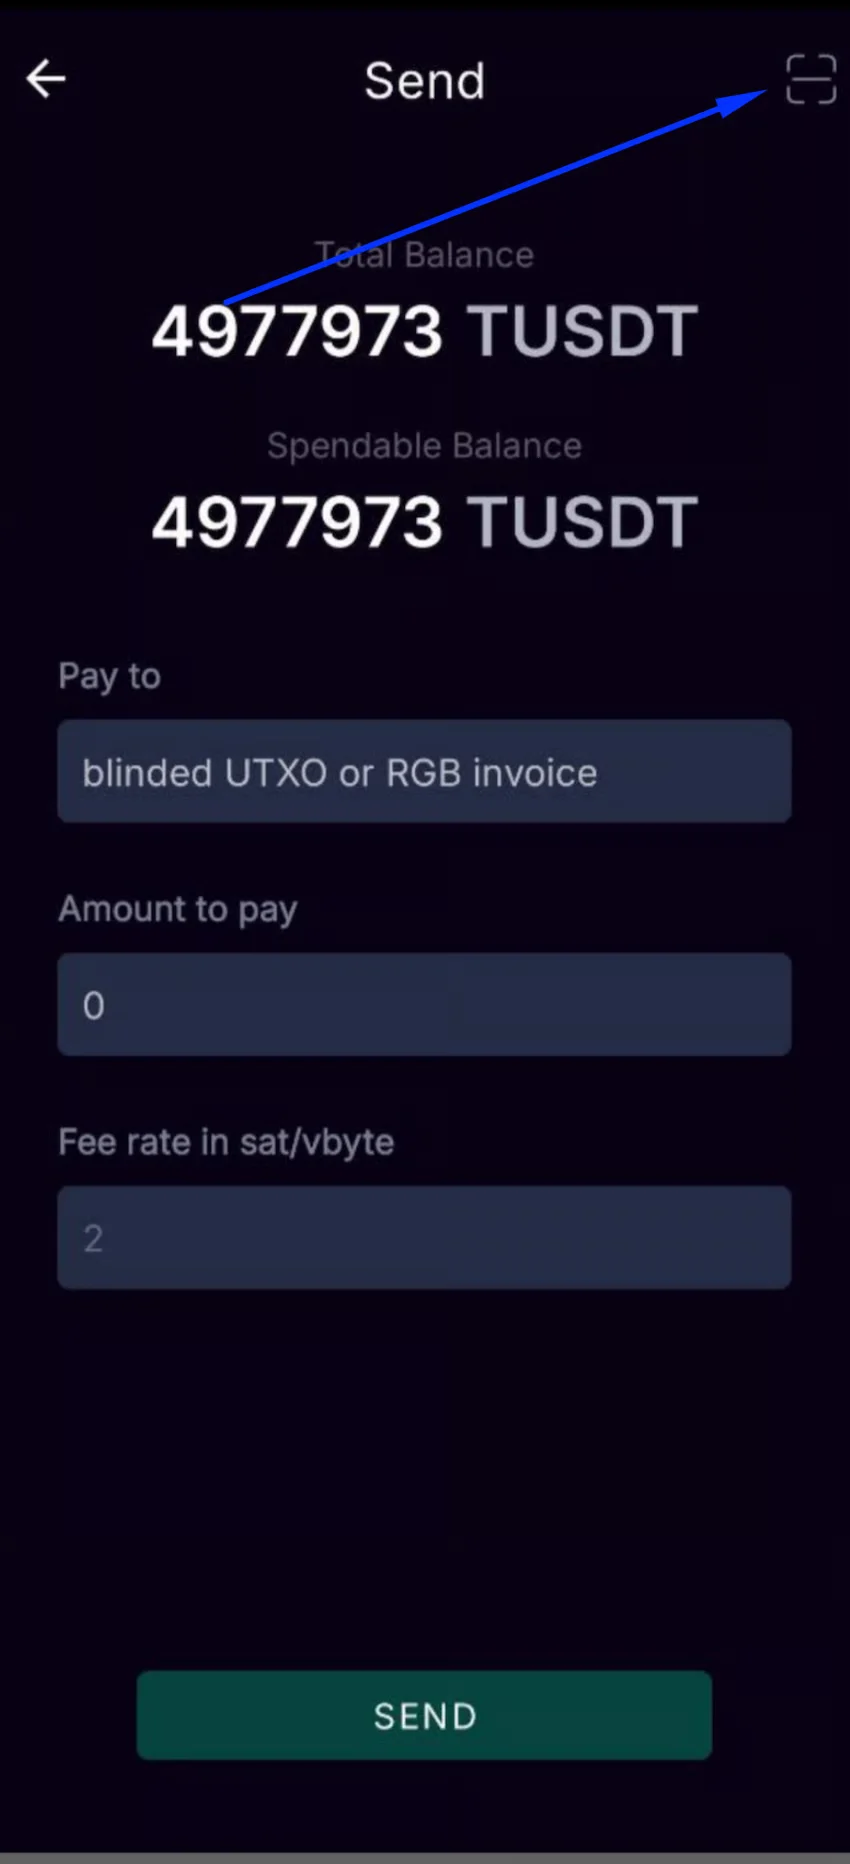
* Tap the QR scanner icon and scan the QR code from the Utexo popup.
* Confirm sending in IRIS Wallet by pressing Send.
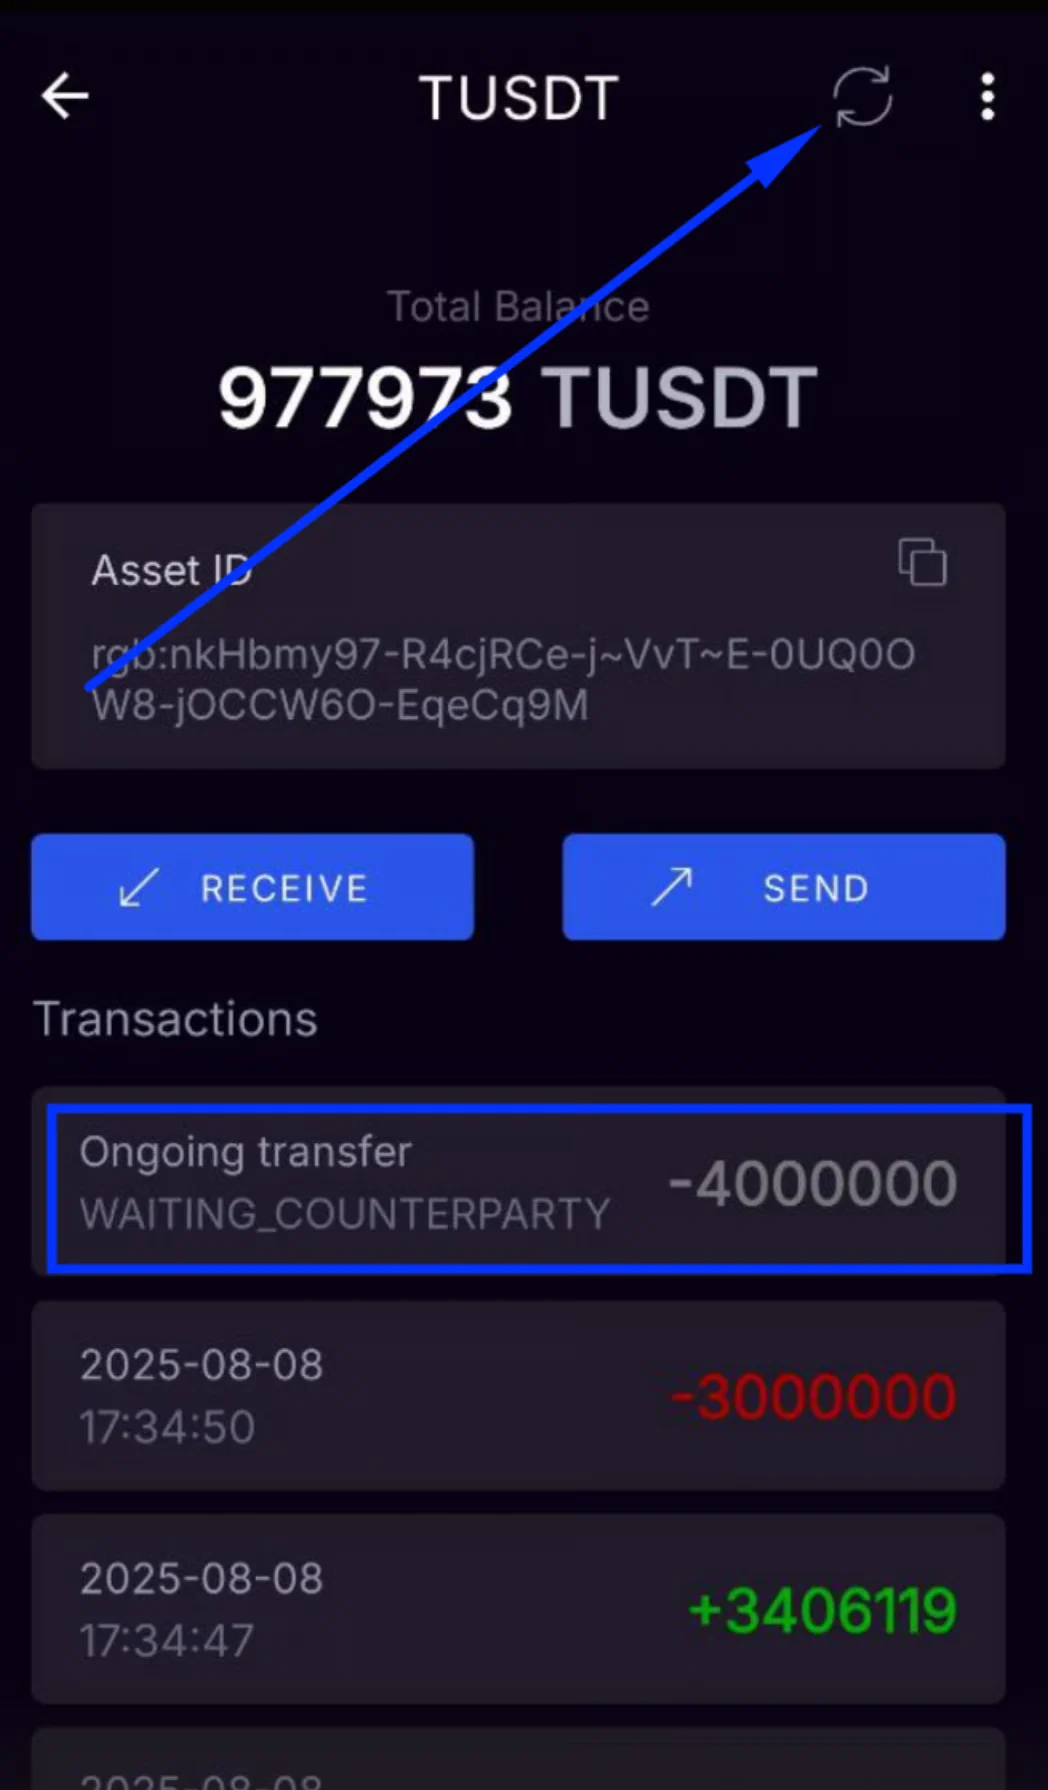
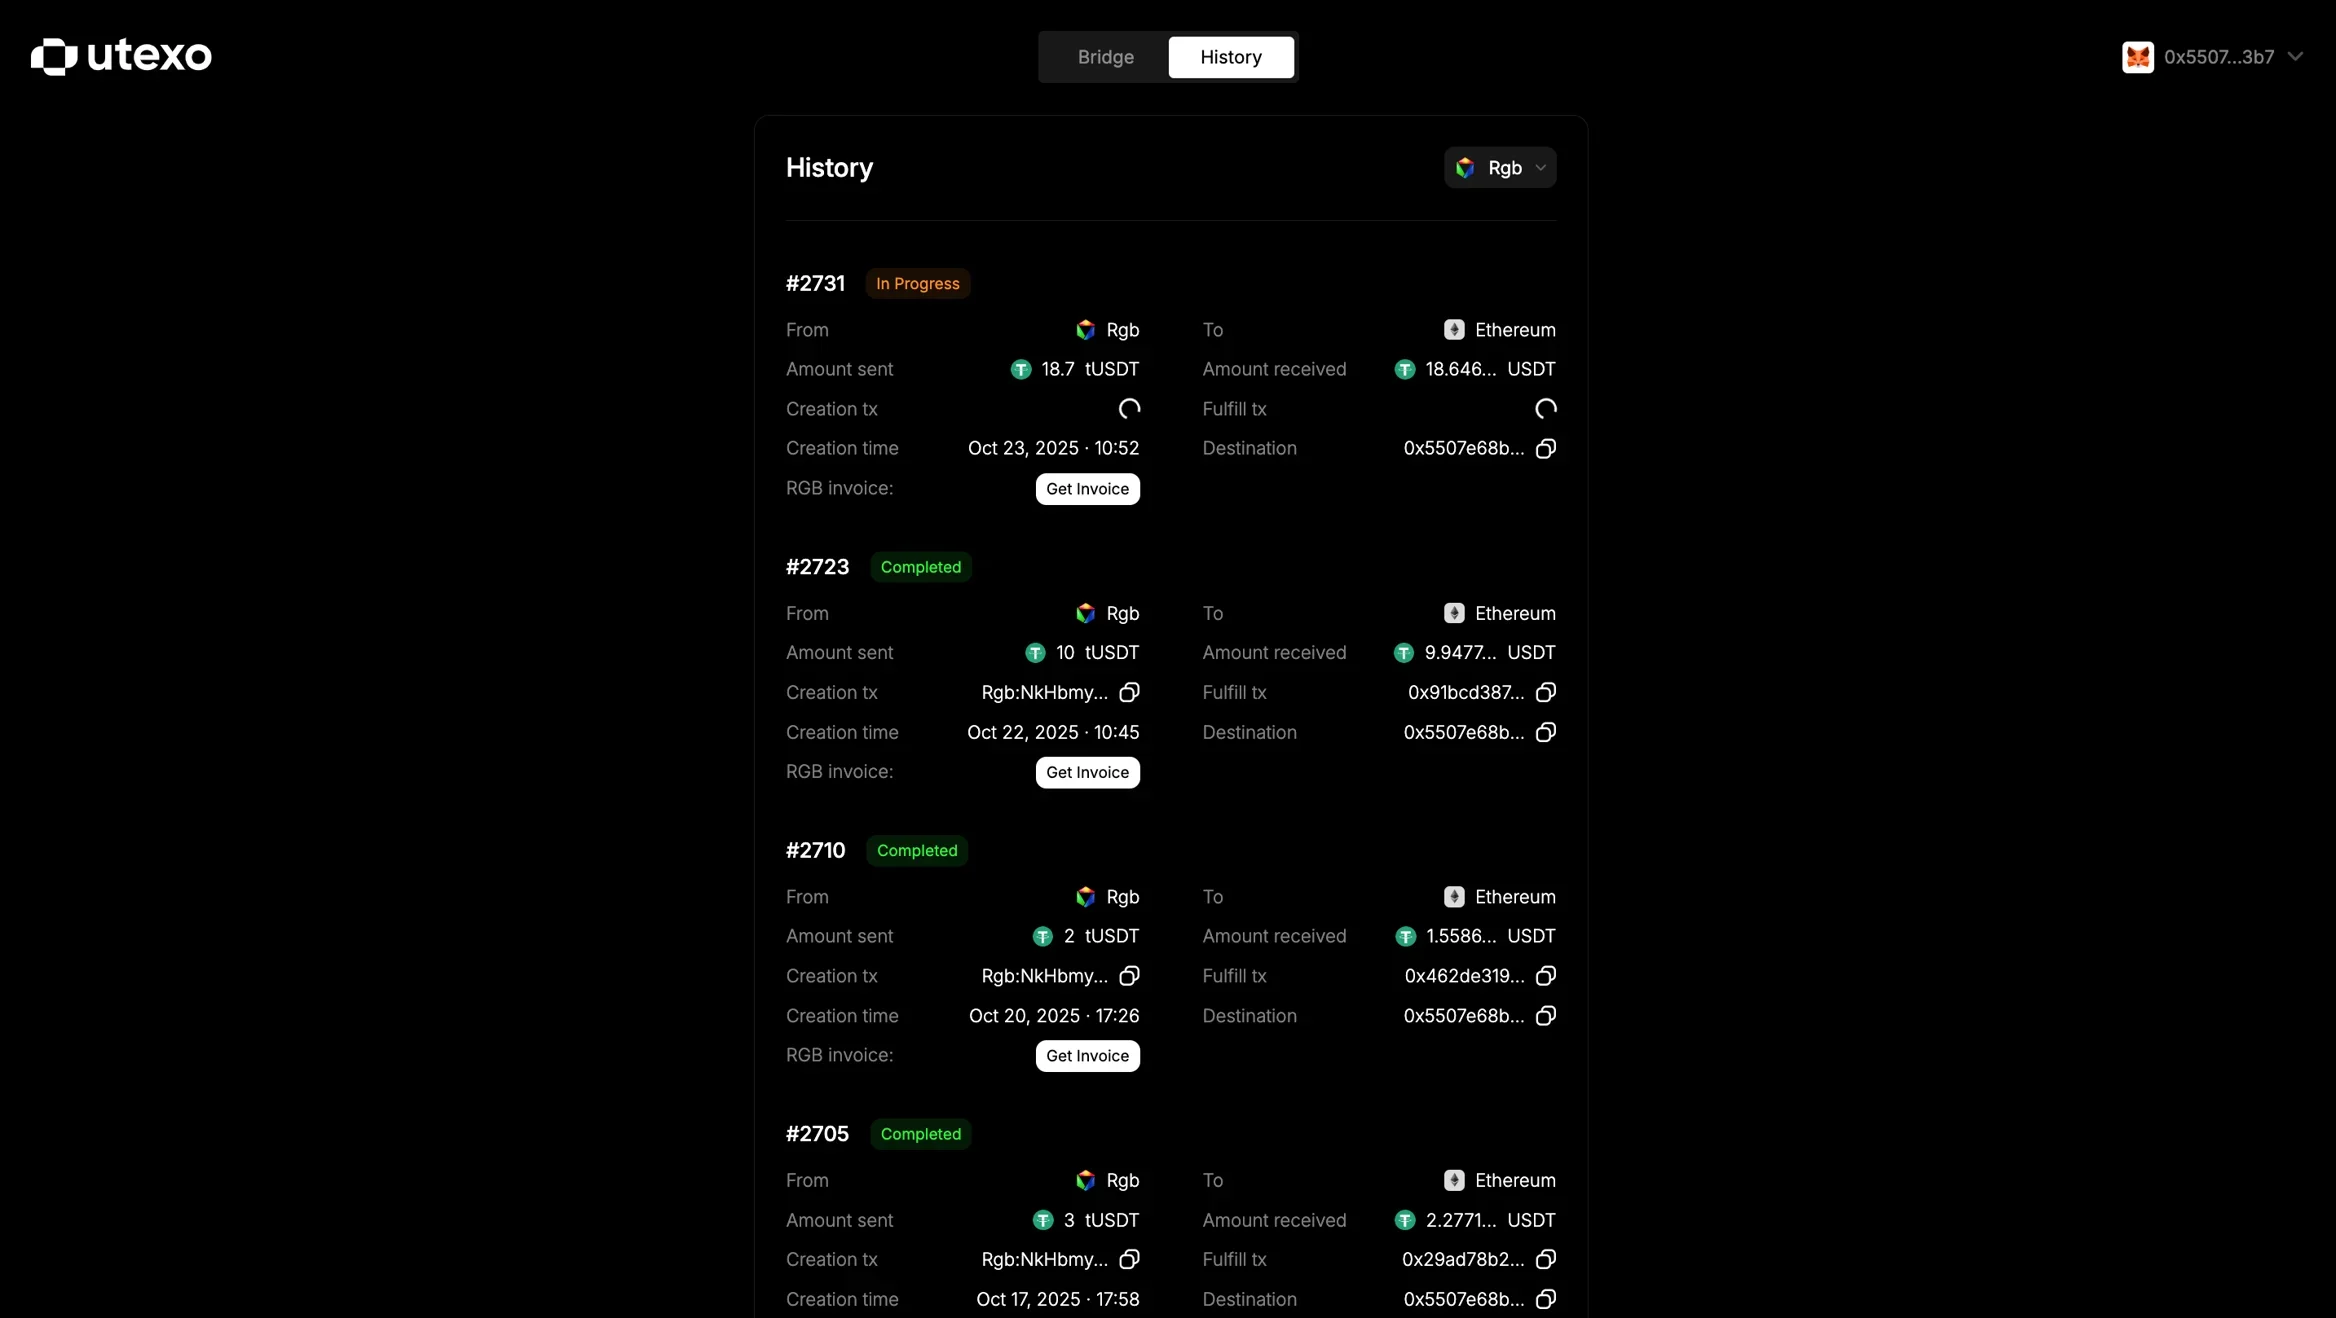
After sending, the transaction will first appear with the status **WAITING\_COUNTERPARTY**.
Refresh your wallet (tap the refresh icon).
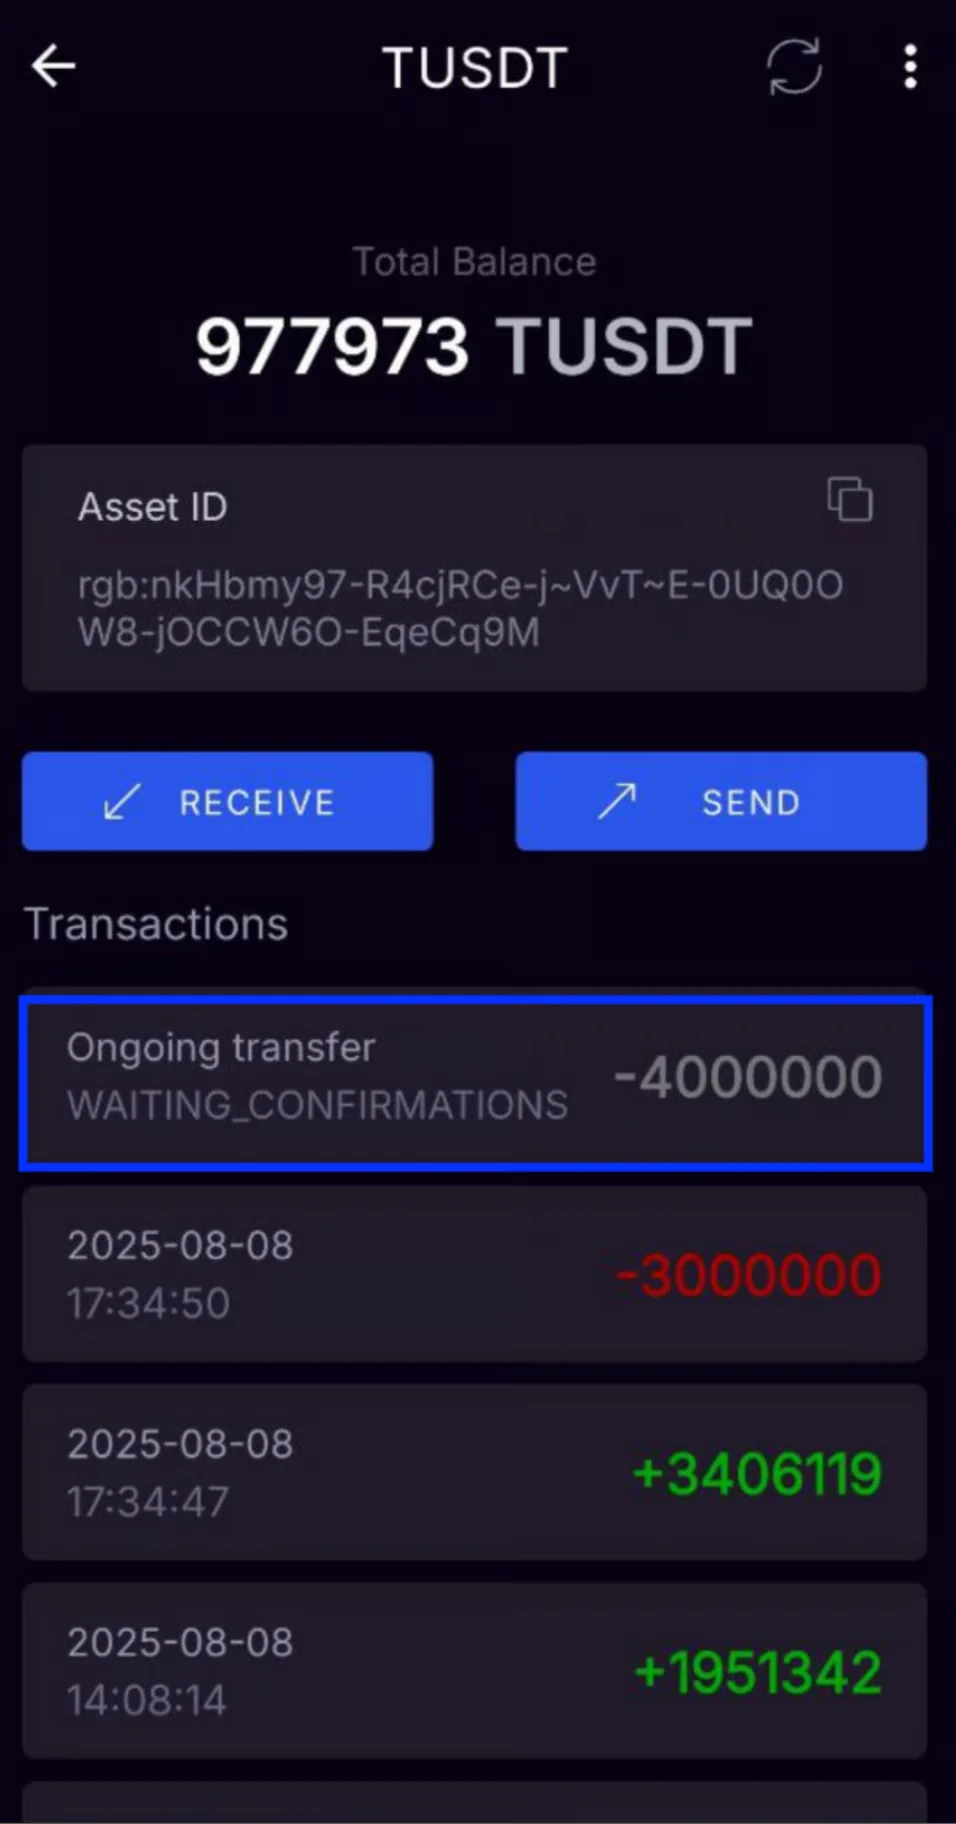
Once refreshed, the transaction status should change to **WAITING\_CONFIRMATIONS**, meaning it is now being processed on the Bitcoin network.
🔧 Additional notes
Transaction time may vary depending on Bitcoin network congestion, in some cases, it may take longer than expected.
In IRIS Wallet, a finalized transaction is highlighted in:
* **Red** – for RGB → Ethereum transfers (asset deduction).
* **Green** – for Ethereum → RGB transfers (asset credit).
You're all set! Enjoy smooth and secure cross-chain transfers with Utexo.
After filling in the form, a **Transaction Preview** will appear showing:
* **You will receive** — estimated amount of tUSDT after fees.
* **Estimated gas fee** — Ethereum network gas fee at live market rates.
* **Bridge commission** — fixed % fee charged by Utexo.
Click **Transfer**. MetaMask will request confirmation in three stages:
**Approve token spending** — A MetaMask popup will appear asking you to approve USDT spending. Click Confirm.
**Confirm the transaction** — Wait 2–10 seconds for the second MetaMask popup. Review the details and click Confirm to complete the transfer.
In the IRIS Wallet mobile app, wait until the tUSDT tokens are credited to your balance.
This may take longer than usual due to high Bitcoin network congestion.
## w RGB → Ethereum Transfers Work (TUSDT → USDT)
On Utexo, set:
* **Send:** Blockchain – RGB, Token – TUSDT.
* **Receive:** Blockchain – Ethereum, Token – USDT.
Enter the **Amount** of TUSDT you want to send.
In the **Destination address** field, enter your Ethereum address (MetaMask).
Review the preview section, it will display:
* **You will receive** - estimated amount of USDT after fees.
* **Estimated gas fee** and Commission.
Click **TRANSFER**.
* Once the bridge generates the RGB invoice (popup with QR code), open the IRIS Wallet mobile app.
* Go to your TUSDT token.
* Tap **Send**.
* Tap the QR scanner icon and scan the QR code from the Utexo popup.
* Confirm sending in IRIS Wallet by pressing Send.
After sending, the transaction will first appear with the status **WAITING\_COUNTERPARTY**.
Refresh your wallet (tap the refresh icon).
Once refreshed, the transaction status should change to **WAITING\_CONFIRMATIONS**, meaning it is now being processed on the Bitcoin network.
🔧 Additional notes
Transaction time may vary depending on Bitcoin network congestion, in some cases, it may take longer than expected.
In IRIS Wallet, a finalized transaction is highlighted in:
* **Red** – for RGB → Ethereum transfers (asset deduction).
* **Green** – for Ethereum → RGB transfers (asset credit).
You're all set! Enjoy smooth and secure cross-chain transfers with Utexo.